

Your deck is an extension of your living space—a place for family gatherings, summer barbecues, and quiet morning coffees. But North Carolina's humid climate and intense UV rays can wreak havoc on wood decks, leading to fading, splintering, mold growth, and rot. Regular cleaning and sealing are essential to protect your investment and keep your deck beautiful and safe for years to come.
Why Deck Maintenance Matters in North Carolina
Our region's climate presents a perfect storm of conditions that attack unprotected wood. High humidity creates ideal environments for mold, mildew, and algae while causing wood to continuously expand and contract—a process that gradually tears apart wood fibers. Heavy rainfall doesn't just make your deck wet; it actively washes away protective sealers and accelerates wood deterioration through constant saturation. Intense summer sun breaks down wood's lignin structure at the cellular level while fading any stain colors you've applied. Add in seasonal temperature fluctuations that cause dramatic wood movement, and you understand why unprotected decks deteriorate so quickly here.
Without proper maintenance, a North Carolina deck can deteriorate significantly in just 2-3 years, requiring costly repairs or complete replacement. The investment in regular cleaning and sealing isn't optional—it's the price of admission for having a beautiful outdoor living space in our climate.
How Often Should You Clean and Seal Your Deck?
Understanding the right maintenance schedule protects your deck without wasting money on unnecessary work. Here's what you need to know:
| Maintenance Task | Minimum Frequency | Recommended Frequency | High-Need Situations |
|---|---|---|---|
| Cleaning | Once/year | Twice/year (spring & fall) | 3 times/year for high-traffic decks |
| Sealing | Every 2 years | Every 1-2 years | Annually for full sun exposure |
Several factors push you toward more frequent sealing: full sun exposure dramatically accelerates sealer breakdown (seal annually if your deck bakes in direct sunlight all day), heavy foot traffic wears away protection faster, severe weather exposure from wind and rain removes sealers more quickly, and using lower-quality sealers means accepting shorter protection periods.
The Simple Water Bead Test
Not sure if your deck needs sealing? Try this quick diagnostic: sprinkle water on your deck surface and watch what happens. If water beads up like droplets on a freshly waxed car, your seal is still working and protecting the wood. If water soaks in immediately, darkening the wood, it's time to reseal. This test takes 30 seconds and gives you a definitive answer about your deck's protection status.
Warning Signs Your Deck Needs Immediate Attention
Don't wait for your scheduled maintenance if you notice these problems developing. Graying or fading wood color signals UV damage penetrating past any remaining sealer. Splintering or rough texture means wood fibers are breaking down and becoming safety hazards. Mold or mildew growth indicates moisture has found purchase—a problem that accelerates rapidly in our humid climate.
Water absorption instead of beading tells you protection has failed completely. Peeling or flaking sealer means the old coating has lost adhesion and must be removed before resealing. Loose or warped boards signal structural issues requiring repair before any cosmetic work. Visible cracks or splits in wood are entry points for moisture and decay organisms.
Addressing these issues promptly prevents more serious damage and expensive repairs. Catching problems at the splintering stage costs far less than replacing boards destroyed by rot that started in untreated cracks.
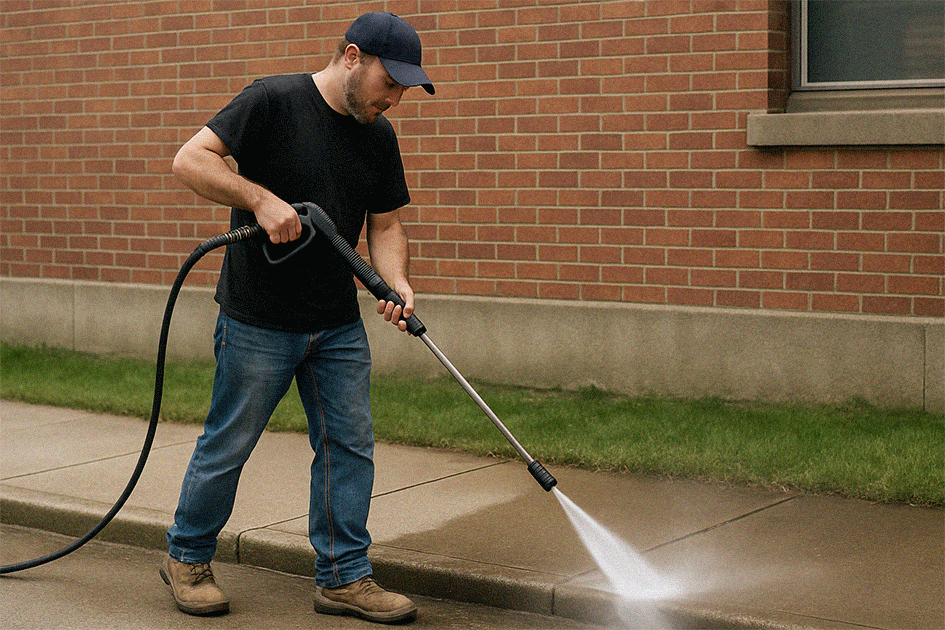
The Complete Deck Cleaning Process
Step 1: Clear Everything Off Your Deck
Begin by removing every item from your deck surface—all furniture and decorations, potted plants, grills and cooking equipment, children's toys, and door mats. Don't forget to clear items from underneath the deck if it's accessible; you don't want cleaning solutions or debris falling on stored items. Once empty, sweep away all loose debris, leaves, and dirt. This preparation seems tedious, but thorough cleaning requires complete access to every board.
Step 2: Inspect for Damage Before Cleaning
Before introducing water and cleaning solutions, carefully inspect your entire deck structure. Check for loose nails or screws that need tightening, wobbly railings that could indicate failing connections, cracked or split boards that might need replacement, and rotting wood—probe suspicious areas with a screwdriver to check for soft, deteriorated wood. Look for any structural issues like sagging joists or loose ledger board connections.
This inspection is crucial: water and cleaning solutions can worsen existing damage, turning minor repairs into major problems. Fix everything you find before proceeding with cleaning.
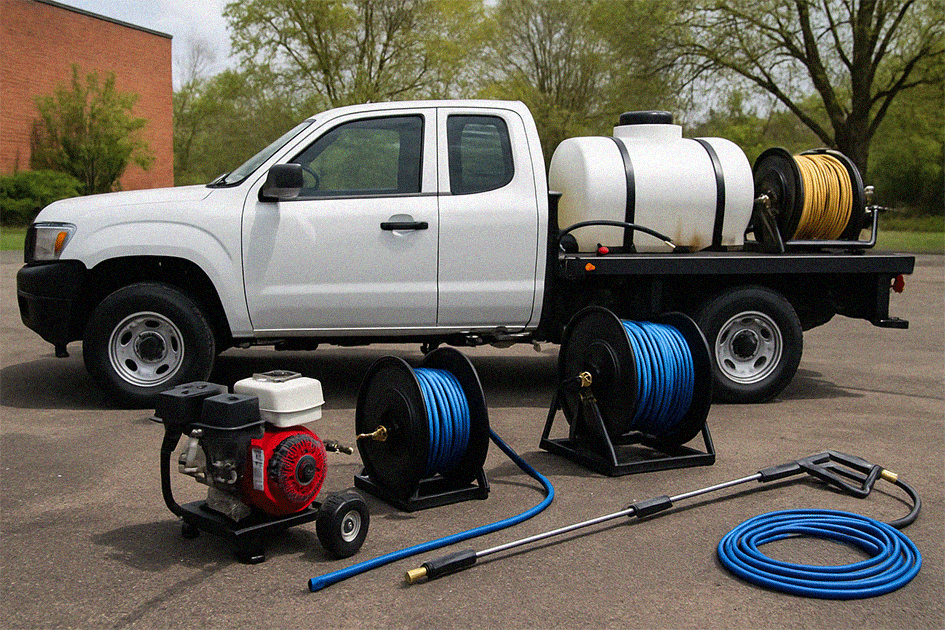
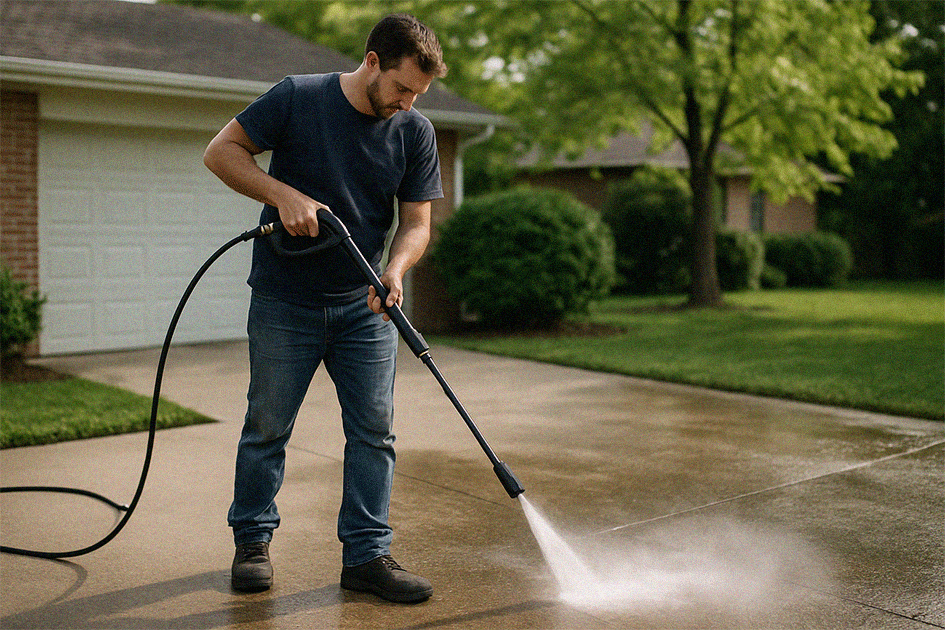
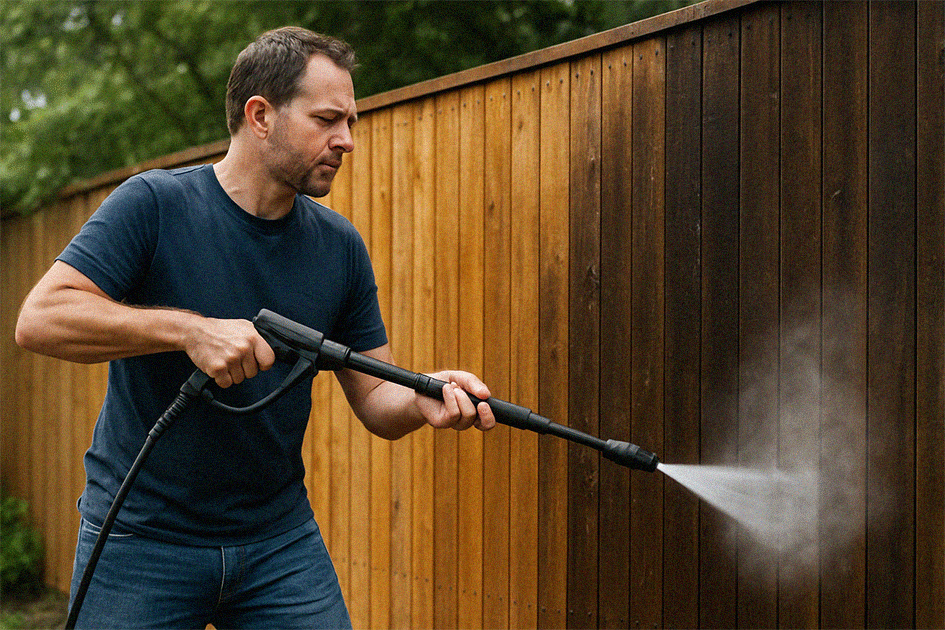
Step 3: Choose Your Cleaning Method
You have three main options, each with distinct advantages and drawbacks:
| Cleaning Method | Best For | Advantages | Risks | Difficulty |
|---|---|---|---|---|
| Professional Soft Washing | Older decks, delicate wood, existing damage | Safe for all wood; deep mold removal; even results; perfect seal prep | Cost | Easy (hire pros) |
| DIY Pressure Washing | Newer decks, confident DIYers | Faster than hand scrubbing; effective cleaning | Can splinter wood; uneven results; fiber damage | Moderate-Hard |
| Hand Scrubbing | Small decks, ultra-gentle approach | Safest method; complete control | Very time-consuming; physically demanding | Easy but tedious |
Professional soft washing uses specialized low-pressure equipment and professional cleaning solutions to safely clean all wood types. The technique kills mold and mildew at the root level while preparing surfaces perfectly for sealing. This approach works especially well for older decks, delicate woods like cedar, and decks with existing damage that high pressure could worsen.
DIY pressure washing can work if you understand the critical parameters: use the lowest effective pressure (500-800 PSI—far lower than most people think), keep your wand at least 12 inches from the surface at all times, use wide spray patterns (40-60 degrees), work with the wood grain direction, and move steadily without concentrating spray on any single spot. Getting too close or using too much pressure creates permanent furring damage that leaves wood looking hairy and absorbing water like a sponge.
Hand scrubbing is the safest DIY approach for small decks or when you want absolute control. Use a quality deck cleaning solution, scrub with a stiff brush, and rinse thoroughly. It's time-consuming—count on a full day for an average deck—but eliminates any risk of pressure damage.
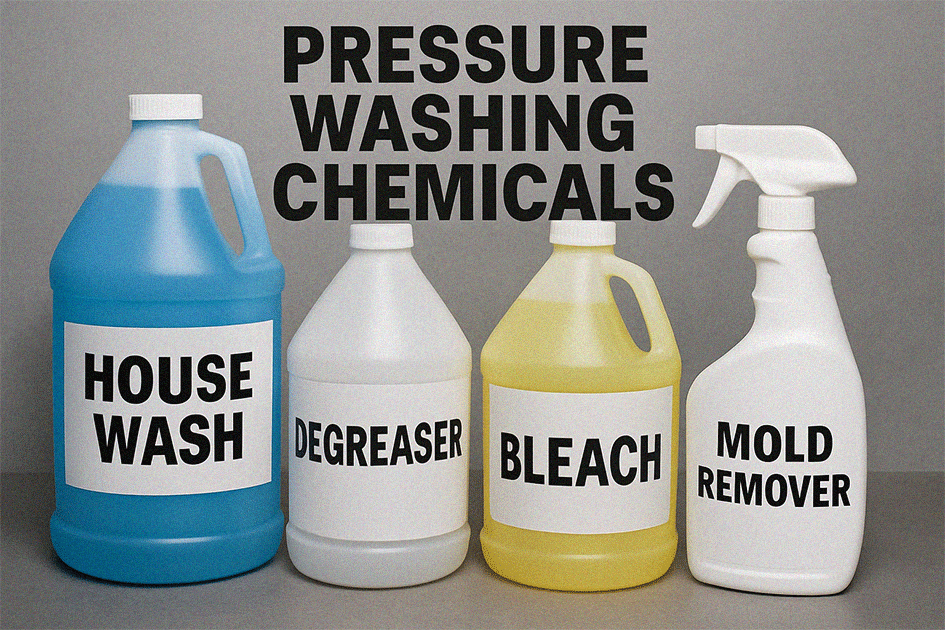
Step 4: Apply Professional Deck Cleaner
Commercial deck cleaners are formulated specifically for wood and typically perform better than homemade solutions. Follow product instructions precisely—most require 10-20 minutes dwell time to break down dirt and kill organisms. Some products need additional scrubbing for heavy staining, and all require thorough rinsing to remove chemical residues.
For a DIY oxygen bleach solution, mix oxygen bleach powder (not chlorine bleach) according to package directions. Apply to your entire deck, scrub problem areas with a stiff brush, let the solution sit for 10-15 minutes, then rinse thoroughly. Oxygen bleach brightens wood naturally without the fiber damage that chlorine bleach causes.
Critical warning: Never use chlorine bleach on wood. It damages fibers at the structural level, lightens color unevenly creating permanent blotches, and accelerates wood deterioration rather than protecting it.
Step 5: Address Stubborn Mold and Mildew
For organic growth that survives initial cleaning, apply a specialized deck mildewcide according to manufacturer instructions. Let the solution work for its recommended time—rushing this step leaves organisms alive to quickly recolonize. Scrub affected areas with a stiff brush, rinse thoroughly, and be prepared to apply a second treatment for severe growth. North Carolina's humidity means mold and mildew often require aggressive treatment to fully eliminate.
Step 6: Rinse Completely
Use a garden hose or low-pressure washer to rinse your entire deck, working from high to low so gravity helps removal. Ensure all cleaning solution is removed—residues can interfere with sealer adhesion or discolor wood. Check between boards, in corners, and around railings where solutions accumulate. Don't forget to rinse nearby plants and landscaping that got splashed during cleaning.
Step 7: Allow Proper Drying Time
This step determines whether your sealing job succeeds or fails. Let your deck dry completely—48 to 72 hours minimum depending on weather conditions. Wood must feel completely dry to the touch, not cool or slightly damp. Ideal drying weather includes sunny conditions, low humidity (under 60%), and temperatures between 50-85°F.
Sealing wet or damp wood traps moisture inside, leading to peeling, bubbling, mildew growth under the sealer, and premature failure. When in doubt, wait an extra day—patience here pays off in years of protection.
Choosing the Right Deck Sealer
Your sealer choice dramatically affects both appearance and longevity. Here's what you need to know:
| Sealer Type | UV Protection | Longevity | Shows Wood Grain? | Best For | Cost/Gallon |
|---|---|---|---|---|---|
| Clear Sealer | Minimal | 6-12 months | Yes, fully | Shaded decks, natural look preference | $25-40 |
| Semi-Transparent Stain | Good | 2-3 years | Yes, partially | Most NC decks (best balance) | $35-60 |
| Solid Stain | Excellent | 3-5 years | No, covers it | Older decks, heavy wear areas | $40-70 |
Clear sealers showcase wood's natural beauty by adding minimal color while providing moisture protection. However, they offer almost no UV protection, meaning wood still grays and deteriorates from sun exposure. Expect to reseal every 6-12 months—more than twice as often as pigmented options. Clear sealers work best for shaded decks protected from direct sun, or for homeowners who prioritize natural appearance over longevity.
Semi-transparent stains provide the ideal balance for most North Carolina decks. They enhance wood color while allowing grain to show through, offer solid UV protection that prevents graying, and last 2-3 years between applications. The slight pigment doesn't hide wood character while providing the protection our intense sun demands.
Solid stains offer maximum UV protection and longevity, covering wood grain entirely like paint. They hide imperfections beautifully, making them ideal for older decks with heavy wear or discoloration. However, they eliminate wood's natural appearance and require careful application to avoid lap marks and uneven coverage.
Oil-Based vs. Water-Based: The Critical Choice
| Feature | Oil-Based Sealers | Water-Based Sealers |
|---|---|---|
| Penetration | Deep into wood fibers | Surface coating primarily |
| Longevity | Generally longer-lasting | Improving with modern formulas |
| Color Enhancement | Rich, warm tones | Natural, true-to-wood colors |
| Dry Time | 24-48 hours | 2-4 hours |
| Odor | Strong during application | Low/minimal |
| Cleanup | Mineral spirits required | Soap and water |
| NC Performance | Excellent in humid conditions | Good with quality products |
| Environmental Impact | Higher VOCs | Lower VOCs, eco-friendly |
Oil-based sealers penetrate deeply into wood fibers, creating protection from within rather than just coating the surface. They generally last longer in North Carolina's humid conditions, enhance wood color beautifully with rich warm tones, and resist moisture penetration better than most water-based options. The downsides include 24-48 hour dry times (plan for perfect weather), strong odor during application and drying, and cleanup requiring mineral spirits instead of water.
Water-based sealers have improved dramatically in recent years. Modern formulations offer good durability, fast drying times (2-4 hours), easy soap-and-water cleanup, low odor that won't drive you indoors, and environmental friendliness with lower VOC emissions. Quality water-based products now perform nearly as well as oil-based options while being far more user-friendly.
For North Carolina: Oil-based sealers generally perform better in our humid conditions, but high-quality water-based products work well too. If you value ease of application and quick project completion, choose water-based. If maximum longevity matters most, oil-based edges ahead.
The Sealing Application Process
Perfect sealing requires ideal conditions and proper technique. Don't compromise on either.
Optimal Weather Conditions
| Factor | Ideal Range | Why It Matters |
|---|---|---|
| Temperature | 50-85°F | Too cold: sealer won't cure. Too hot: too-rapid drying causes issues |
| Humidity | Under 70% | High humidity slows drying and can cause clouding |
| Rain Forecast | None for 48 hours | Rain within 48 hours ruins uncured sealer |
| Sun Exposure | No direct hot sun | Hot surfaces cause uneven drying and application problems |
| Wind | Light breeze | Helps drying; too much causes debris and overspray issues |
Check your weather forecast carefully and plan your sealing project for a 48-hour window of ideal conditions. Starting Friday morning for a weekend without rain works well for most homeowners.
Application Method Comparison
Brushing (most recommended for railings and edges) works sealer into wood grain for maximum penetration, allows controlled application preventing pudd
ling, and provides thorough coverage of hard-to-reach areas. It's time-consuming but delivers the best results for vertical surfaces and detailed work.
Rolling (best for large flat deck surfaces) covers area quickly, works well for main deck boards, and reduces application time significantly. However, rollers can miss gaps between boards and may not penetrate as deeply as brushing. Use rollers for speed on flat surfaces, then detail work with brushes.
Spraying (fastest but requires experience) achieves rapid coverage of large areas but demands back-brushing for proper penetration. There's significant risk of overspray onto siding, plants, and other surfaces you don't want sealed. Reserve spraying for experienced users or professionals with proper equipment and technique.

Step-by-Step Application
First, stir your sealer thoroughly without shaking—shaking creates bubbles that mar the finish. Stir gently but completely to distribute settled pigments evenly.
Second, start with railings and vertical surfaces. Brush in the direction of wood grain, wipe up drips immediately before they dry, and work from top to bottom so drips fall onto unsealed areas.
Third, apply sealer to deck boards working lengthwise with the grain. Do 2-3 boards at a time, maintaining a wet edge to prevent lap marks. Don't let sealer puddle—excess doesn't add protection, it just causes problems.
Fourth, apply thin, even coats. Two thin coats always outperform one thick coat. Thick applications peel, crack, and dry unevenly while thin coats penetrate properly and wear gradually.
Fifth, allow proper drying between coats following manufacturer instructions—usually 4-24 hours depending on product and weather. Test for complete drying before applying additional coats.
Sixth, apply a second coat if recommended. Most sealers perform significantly better with two coats, and the second coat adds years of protection for just a few more hours of work.
Critical Mistakes That Ruin Sealing Jobs
Sealing too soon after cleaning tops the list. Wood must be bone dry—rushing this step causes every problem imaginable. Wrong weather conditions guarantee failure; temperature and humidity aren't suggestions. Not stirring sealer means pigments stay at the bottom while you apply clear liquid on top. Applying too thick creates peeling and uneven drying that looks terrible within months. Skipping a test area can result in discovering you hate the color after covering 300 square feet. Ignoring the weather forecast means watching rain wash away your weekend's work. Over-application wastes product and creates problems—more is not better with deck sealers.
Special Considerations for North Carolina Wood Types
Southern Yellow Pine
This regional favorite comes with unique challenges. Pine absorbs sealer unevenly, often creating blotchy appearances if not properly prepared. It requires careful cleaning and benefits enormously from pre-stain wood conditioner applied before sealing. You may need extra coats in high-wear areas where pine's softer grain wears through faster.
Pressure-Treated Lumber
Most North Carolina decks use pressure-treated southern yellow pine for its rot resistance and affordability. However, new pressure-treated wood must weather 3-6 months before first sealing—fresh treatment chemicals prevent sealer adhesion. Check moisture content before sealing; if water still beads on the surface, wait longer. Modern treatment chemicals may require specific sealer types, so follow manufacturer recommendations carefully.
Exotic Hardwoods
Ipe, cumaru, and other tropical hardwoods are extremely dense, making sealing difficult or unnecessary. These woods resist moisture naturally and may not absorb sealer at all. Some species need special preparation, while others look best left natural with periodic cleaning only. Research your specific hardwood's needs and consider products formulated specifically for dense tropical species.
Composite Decking
While not wood, composite decks need proper care too. Never use wood deck cleaners on composite—they can damage the material. Composite requires specific cleaners formulated for synthetic materials. Some composites can be pressure washed (check your warranty first), but most don't require sealing at all. Follow manufacturer guidelines precisely to avoid voiding warranties.
Maintenance Between Deep Cleanings
Consistent light maintenance dramatically extends time between major cleaning and sealing projects.
Weekly tasks take just minutes: sweep off leaves and debris before they stain, remove standing water that promotes mildew growth, and check for new stains or spills to address immediately.
Monthly maintenance includes hosing down your deck with plain water to remove surface dirt, checking furniture for rust spots or stains where metal contacts wood, and trimming nearby vegetation that drops debris or holds moisture against deck surfaces.
Seasonal deep cleaning and inspection catches problems early. Touch up high-traffic areas showing wear, check for repairs needed before they become major issues, and adjust maintenance frequency if you notice accelerated problems.
After events and gatherings, clean up food and beverage spills immediately—they stain far worse when left overnight. Rinse away any substances that could mar your finish before they have time to penetrate.
The Real Cost of Deck Maintenance
Understanding costs helps you make informed decisions about DIY versus professional service.
DIY Investment
| Item | Cost Range |
|---|---|
| Deck cleaner | $20-40 |
| Brushes and tools | $20-30 |
| Pressure washer rental (if needed) | $50-100/day |
| Your time investment | 4-8 hours cleaning |
| Sealer/stain (2-4 gallons) | $60-240 |
| Application brushes/rollers | $15-30 |
| Your time investment | 6-12 hours sealing |
| Total DIY Cost | $135-260 plus 10-20 hours labor |
Professional Service Investment
- Cleaning only: $150-300 for average deck
- Sealing only: $250-500 for average deck
- Combined service: Often discounted to $350-700
Professional service delivers expert results using optimal products, saves your entire weekend, applies knowledge that prevents common mistakes, and often provides longer-lasting results through superior technique and commercial-grade materials.
When Professional Service Makes Sense
Consider hiring professionals when your deck shows severe mold or mildew that simple cleaning won't eliminate, wood is significantly weathered or damaged and you're unsure about proper treatment, you lack time or physical ability for the demanding work required, your deck is multi-level or architecturally complex making DIY dangerous, you want guaranteed results without trial-and-error learning, or previous DIY attempts failed to achieve satisfactory outcomes.
Long-Term Protection Strategy
The most effective approach combines several elements. Schedule annual professional deep cleaning in spring after pollen season ends. Implement bi-annual sealing every 1-2 years depending on sun exposure and product quality. Maintain regular upkeep including sweeping, spot cleaning, and debris removal. Make prompt repairs to fix damage immediately before it expands into major problems. Use preventive measures like furniture pads to prevent scratches, umbrellas or pergolas for shade protection, and proper drainage to prevent standing water.
When Cleaning and Sealing Aren't Enough
Sometimes damage exceeds what maintenance can address. Repair makes sense for individual loose or damaged boards, wobbly railings that need reinforcement, surface cracks that haven't compromised structure, popped nails requiring replacement with screws, and minor rot isolated to small areas.
Replacement becomes necessary when you see widespread rotting affecting multiple areas, structural instability indicating failing support systems, severe splitting throughout the deck surface, failed support posts compromising safety, or a deck older than 15-20 years with multiple major issues. A professional can assess whether your deck needs maintenance, repair, or replacement—an honest evaluation now prevents catastrophic failure later.
The Investment Perspective
A well-maintained deck lasts 15-20 years or more, providing decades of enjoyment and adding value to your home. Neglected decks may need complete replacement in just 5-10 years. The mathematics are straightforward:
- Annual maintenance cost: $350-700/year
- Deck replacement cost: $8,000-20,000+
Over a 15-year period, consistent maintenance costs $5,250-$10,500 while replacement costs $8,000-$20,000+ without giving you any additional years of deck life. The choice becomes clear: invest in maintenance and enjoy your beautiful deck for decades, or neglect it and face premature replacement at far higher cost.
Ready to Restore Your Deck?
At Exterior Shine, we specialize in deck cleaning and preparation using gentle soft washing techniques that clean deeply without damaging wood. Our approach safely removes dirt, mold, and mildew while preparing surfaces perfectly for sealing. We won't damage wood fibers with excessive pressure, and our methods extend your deck's life while restoring its natural beauty.
We can also connect you with trusted partners for sealing and staining services, creating a complete maintenance solution for your outdoor living space.
Don't let your deck deteriorate from neglect. Contact Exterior Shine at (704) 980-9859 for a free consultation. We'll assess your deck's current condition, recommend the best cleaning approach, and help you create a maintenance plan that protects your investment and keeps your outdoor living space beautiful for years to come.

Scott Deviney
Co-Founder & Customer Relations
Scott handles all aspects of customer service and ensures that every client receives the personalized attention they deserve. With a background in business management and a genuine passion for helping people, he's built Exterior Shine's reputation for outstanding customer care.