

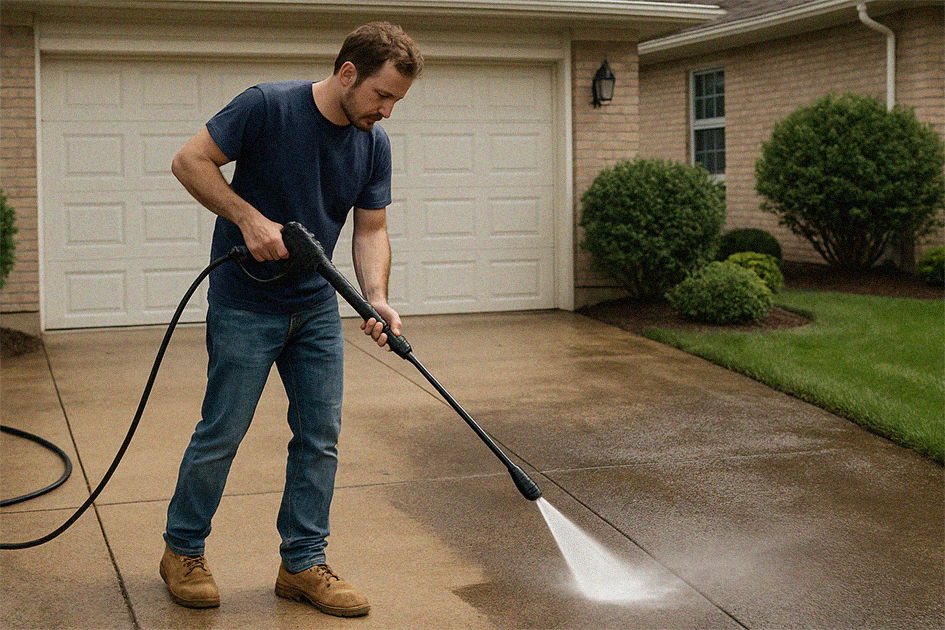
Your driveway is one of the first things people see when they visit your home, but it's also one of the most abused surfaces on your property. Between vehicle traffic, oil leaks, tire marks, and North Carolina's red clay, driveways can quickly become eyesores. The good news? With the right techniques, you can restore your driveway to like-new condition and keep it looking great year-round.
Common Driveway Stains and Issues
Understanding what you're dealing with is the first step to effective treatment. Each type of stain requires a different approach, and misidentifying the problem can lead to wasted effort or even permanent damage.
Oil and grease stains are the #1 driveway problem we encounter. These dark, spreading stains come from engine leaks, transmission fluid drips, and grease from mechanical work. The challenge is that oil penetrates deep into porous concrete—what starts as a small drip on the surface quickly migrates into the concrete's internal structure, making surface cleaning ineffective. Fresh oil stains respond well to immediate treatment, but once they've had weeks or months to penetrate and oxidize, removal becomes exponentially more difficult.
Tire marks appear especially prominently on light-colored concrete, creating black rubber streaks that won't wash away with water alone. Hot tire marks from parking on scorching summer days are particularly stubborn, as the heat causes rubber compounds to actually bond with the concrete surface. Skid marks from quick stops create similar problems—these aren't just surface dirt but actual rubber deposits embedded in the concrete's pores.
Rust stains present as orange or reddish-brown discoloration that many homeowners mistake for red clay. These stains typically originate from metal lawn furniture left on the driveway, tools that sat in one spot during rain, fertilizer containing iron content that dissolved and ran onto the concrete, or decorative metal items. Rust stains are particularly tricky because using the wrong cleaning product—specifically chlorine bleach—can actually set them permanently.
Organic growth manifests as green or black patches in shaded areas, creating not just an appearance problem but a safety hazard. Mold, mildew, and algae make surfaces slippery when wet, potentially causing falls. These organisms thrive in North Carolina's humid climate, particularly on north-facing driveways or areas shaded by trees and structures. Dark streaks along edges often indicate established algae colonies that have been growing for seasons.
Red clay staining is North Carolina's special challenge—one that homeowners from other regions rarely encounter. This distinctive orange-red discoloration comes from our iron-rich clay soil being tracked from lawns and gardens onto concrete surfaces. The problem intensifies during wet seasons when clay becomes sticky and adheres aggressively to everything it contacts. Unlike surface dirt, red clay contains iron oxide particles that penetrate deeply into concrete pores, creating stains that are notoriously difficult to remove once established.
| Stain Type | Appearance | Difficulty to Remove | Primary Challenge | Urgency |
|---|---|---|---|---|
| Fresh Oil | Dark wet spot | Easy | Penetrates quickly | HIGH - Treat within hours |
| Old Oil | Black embedded stain | Very Hard | Deep penetration | MODERATE - Professional help often needed |
| Tire Marks | Black rubber streaks | Moderate | Bonded to surface | LOW - Cosmetic issue |
| Rust | Orange/brown | Hard | Wrong cleaner sets permanently | MODERATE - Use correct method |
| Organic Growth | Green/black patches | Easy | Safety hazard when wet | MODERATE - Slipping risk |
| Red Clay | Orange-red discoloration | Hard | Iron oxide penetration | MODERATE - Worsens if neglected |
Why Professional Pressure Washing Works Best
While you can tackle some stains yourself, professional pressure washing offers significant advantages for driveways that DIY approaches simply can't match. Understanding these differences helps you make informed decisions about when to DIY and when to call the pros.
The power difference between professional and consumer equipment is dramatic. Commercial pressure washers operate at 3000-4000 PSI with water flow rates of 4-8 gallons per minute, while consumer models typically max out at 1300-2000 PSI with 2-3 GPM. This isn't just a 50% difference—the cleaning power increases exponentially with pressure and flow. What takes you hours of scrubbing might take professionals minutes with proper equipment.
Surface cleaners are the secret weapon that separates amateur from professional results. These rotary attachments create a hovering cleaning head with dual rotating jets that clean evenly without leaving streaks. Consumer attempts with wand-style pressure washing almost always result in "tiger-striping"—those telltale uneven cleaning lines that instantly identify amateur work. Surface cleaners eliminate this problem entirely while working faster, containing overspray, and protecting surrounding landscaping from high-pressure water.
Specialized cleaning solutions available to professionals far exceed consumer products in effectiveness. Professional-grade degreasers formulated specifically for concrete penetrate deeper and work faster than anything available at hardware stores. More importantly, pros understand proper dilution ratios—too weak and products don't work, too strong and they can damage surfaces or create environmental concerns. Each stain type often requires different chemical treatment, knowledge that comes from years of experience rather than reading product labels.
Experience and technique prevent the costly mistakes that plague DIY attempts. Professionals know exactly how much pressure different concrete finishes can tolerate, recognize when stains are permanent and require alternative solutions, understand how to work around expansion joints and edges without causing damage, and can assess whether your specific driveway surface might be damaged by pressure washing. They've seen every type of stain and surface condition, giving them immediate knowledge about what will work and what won't.
DIY Driveway Stain Removal Methods
For maintenance between professional cleanings, or for homeowners who want to tackle smaller problems themselves, these proven approaches can yield good results when applied correctly.
For Fresh Oil Stains
Immediate action is everything when dealing with fresh oil spills. The longer oil sits on concrete, the deeper it penetrates and the harder removal becomes. If you catch a spill within the first few hours, you have an excellent chance of complete removal.
Start by absorbing the oil before it can migrate deeper. Cover the entire spill with cat litter (the clay-based kind, not clumping), cornstarch, or sawdust—these absorbent materials pull oil out of the surface pores. Let the absorbent sit for 30 minutes to an hour, giving it time to wick up as much oil as possible. Sweep up the saturated material and repeat the process if the stain still appears wet. Some stubborn spills require 2-3 applications of fresh absorbent.
Next, apply a degreaser to break down remaining oil. Automotive degreaser or simple dish soap works surprisingly well for fresh stains. Scrub vigorously with a stiff-bristled brush to work the degreaser into the concrete pores where oil has penetrated. Let the degreaser sit for 30 minutes—this dwell time is crucial for allowing the chemicals to break down oil molecules. Rinse with the hottest water available (hot water liquefies oil, making it easier to remove), and repeat the process as needed. Don't expect perfection on the first try; fresh oil stains often require 2-4 treatment cycles for complete removal.
For any remaining stains, commercial oil stain removers formulated specifically for concrete provide the next level of treatment. These products contain powerful degreasers and surfactants designed to penetrate deep into concrete. Follow product directions exactly—more isn't better, and proper dwell time matters more than quantity applied. Multiple applications over several days often work better than one aggressive treatment.
For Set-In Oil Stains
Older stains that have had weeks or months to penetrate and oxidize require more aggressive approaches and realistic expectations about outcomes.
Trisodium Phosphate (TSP) is one of the most effective treatments for stubborn oil stains. Mix TSP with hot water according to package directions—typical ratios are 1/2 cup TSP per gallon of water, though badly stained areas may benefit from stronger concentrations. Apply the solution liberally to the stain, covering the entire affected area plus an inch or two beyond visible staining. Let it sit for 30 minutes to allow the chemical action to work. Scrub vigorously with a stiff brush, applying significant pressure to work the solution into concrete pores. Rinse thoroughly with hot water. Expect to repeat this process 2-3 times for old stains.
Important safety note: TSP is caustic and can cause skin irritation and eye damage. Always wear rubber gloves and safety glasses, work in well-ventilated areas, and rinse thoroughly to prevent residue.
Commercial concrete degreasers formulated specifically for oil removal often outperform TSP, though they cost more. Apply the degreaser according to product instructions, paying careful attention to recommended dwell time—usually 15-30 minutes depending on stain severity. Agitate the solution into the concrete using a push broom or stiff brush, creating mechanical action that helps chemicals penetrate. Rinse completely with water. Severe stains may require 2-3 applications over several days, allowing the concrete to dry completely between treatments.
The poultice method represents the most aggressive DIY approach for truly stubborn old stains. This technique uses time and concentration to draw oil out of deep concrete pores. Mix an absorbent material (cat litter or sawdust) with degreaser to create a thick paste—consistency should resemble peanut butter. Apply the paste 1/4 to 1/2 inch thick over the entire stain, covering it completely. Cover the poultice with plastic wrap to prevent premature drying and extend working time. Let it sit for 24-48 hours, during which the degreaser breaks down oil while the absorbent wicks it to the surface. Remove the dried poultice, scrub the area, and rinse thoroughly. Repeat if necessary—severely stained areas may require 2-3 poultice treatments.
For Tire Marks
Tire marks respond well to treatment but require appropriate products—general cleaners often prove ineffective against bonded rubber.
Commercial tire mark removers work fastest and most effectively. These specialized products contain solvents that break down rubber compounds. Apply directly to the marks, let sit for the recommended time (usually 5-10 minutes), agitate with a brush, and rinse thoroughly. Most tire marks disappear with one application.
For a DIY alternative, mix 1 cup baking soda per gallon of hot water. Scrub the tire marks with a stiff brush, applying considerable pressure. Baking soda's mild abrasiveness combined with its alkalinity helps lift rubber deposits. For stubborn marks that resist liquid treatment, make a paste of baking soda and just enough water to create peanut butter consistency. Apply this paste directly to marks, let sit for 15 minutes, scrub vigorously, and rinse well.
For Rust Stains
Rust stains require specific chemistry—the wrong approach can make them permanent.
Never use chlorine bleach on rust stains—this is the single most important rule. Chlorine oxidizes rust, causing a chemical reaction that sets the stain permanently into concrete. Once this happens, the rust becomes essentially impossible to remove.
Instead, use commercial rust removers formulated specifically for concrete. These products typically contain oxalic acid or phosphoric acid that chemically converts iron oxide (rust) into water-soluble compounds. Apply per product directions, which usually require significant dwell time—15-30 minutes or more. Scrub if product directions recommend it. Rinse thoroughly with water. Severe rust stains may need professional help, as they can penetrate very deeply into concrete's porous structure.
For Red Clay Stains
North Carolina's distinctive red clay requires a specific approach that differs from general dirt cleaning.
The key to red clay management is prevention through immediate action. Rinse away loose clay immediately when it's still wet—once it dries, iron oxide particles bond with concrete and become exponentially harder to remove. If you notice red clay tracked onto your driveway, grab the hose immediately.
For existing clay stains, oxygen bleach (like OxiClean) works better than any other DIY method. Mix the product per directions, creating a solution that's typically 1 part oxygen bleach to 4 parts warm water. Apply liberally to stained areas, ensuring complete coverage. Scrub with a stiff brush to work the solution into concrete pores. Let sit for 30 minutes—this dwell time allows the oxygen bleach to break down iron oxide bonds. Rinse thoroughly with water. Expect to repeat this process 2-3 times for established stains. Prevention remains easier than cure—rinse your driveway after rain or anytime you notice clay tracking.
| Stain Type | Best DIY Solution | Application Method | Success Rate | Time Required |
|---|---|---|---|---|
| Fresh Oil | Absorbent + dish soap | Absorb, degrease, scrub, rinse | 90%+ | 1-2 hours |
| Old Oil | TSP or commercial degreaser | Apply, dwell 30min, scrub, rinse, repeat | 50-70% | 4-8 hours over multiple days |
| Very Old Oil | Poultice method | Apply thick paste, wait 24-48hr, remove | 40-60% | 2-3 days |
| Tire Marks | Baking soda paste | Scrub with paste, rinse | 80%+ | 30-60 minutes |
| Rust | Oxalic acid rust remover | Apply, dwell 15-30min, rinse | 70-85% | 1-2 hours |
| Red Clay | Oxygen bleach | Apply, scrub, dwell 30min, rinse | 60-80% | 1-2 hours, repeat |
Professional Pressure Washing for Driveways
When DIY methods reach their limits, or when you want comprehensive cleaning without the labor, professional pressure washing delivers transformative results.
The professional process follows a systematic approach that ensures complete cleaning. It begins with pre-treatment of oil and stubborn stains using commercial-grade degreasers and specialized spot treatments—products not available to consumers. These chemicals sit on problem areas while equipment is set up, providing 10-15 minutes of dwell time before washing begins.
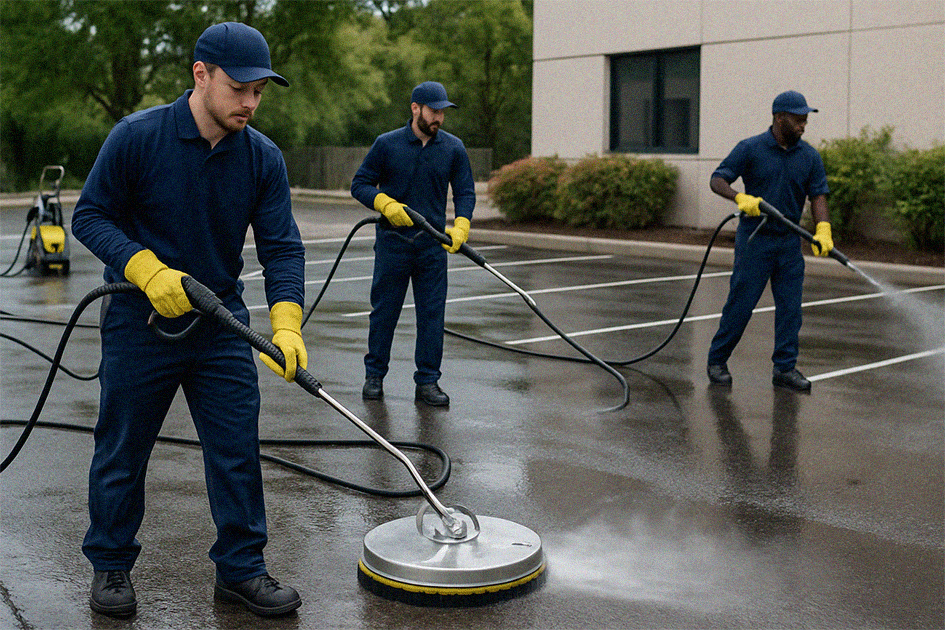
High-pressure surface cleaning forms the core of the process. Using rotary surface cleaners operating at 3000-4000 PSI, professionals systematically clean the entire driveway in overlapping passes that leave no streaks or uneven areas. The cleaning head hovers slightly above the surface, creating a concentrated cleaning zone while containing overspray that could damage nearby landscaping.
Hot water application can be deployed when needed for oil removal. Hot water—often heated to 180-200°F by professional equipment—liquefies oil and grease, allowing it to be flushed away rather than just pushed deeper. This capability alone often justifies professional service for driveways with significant oil contamination.
Post-treatment addresses any remaining stains that resisted initial cleaning. Professionals apply targeted treatments, allow appropriate dwell time, and perform spot cleaning with specialized techniques. While not every stain can be removed (more on this later), experienced pros know exactly how far they can push treatment without damaging concrete.
Optional sealing provides long-term protection after cleaning. Concrete sealer prevents future stains from penetrating, makes maintenance easier, and enhances appearance. Most professionals recommend sealing immediately after cleaning while concrete is freshly exposed and receptive to sealer penetration.
Typical results include most stains significantly reduced or completely removed, perfectly even cleaning with no tiger-striping or missed spots, restored appearance that can make decade-old driveways look nearly new, and cleanliness that lasts significantly longer than DIY attempts due to complete removal of contaminants.
Timing expectations are reasonable for professional work. An average residential driveway requires 1-3 hours including setup and cleanup, though heavily stained driveways with extensive pre-treatment needs may take longer. Surfaces are safe to walk on immediately after cleaning, and vehicles can return to the driveway once it's dry—usually within a few hours in good weather.
Optimal scheduling takes advantage of weather and seasonal factors. Spring cleaning (after winter de-icing salt and debris) starts your year fresh, while fall cleaning before winter weather prepares your driveway for the harshest season. Many homeowners schedule cleaning before special events—holidays, parties, graduations—when curb appeal matters most. The general recommendation is annual cleaning minimum for most driveways, bi-annual service for driveways with heavy traffic or significant tree coverage, and as-needed treatment when new stains appear.
Protecting Your Clean Driveway
After investing time and money in thorough cleaning, protection measures extend your results and make future maintenance easier.
Concrete sealer is the single most effective protection you can apply. Quality sealer prevents stain penetration by filling concrete pores, making future cleaning dramatically easier since stains can't bond with sealed surfaces. It protects against weather damage including freeze-thaw cycles, salt damage, and moisture intrusion. Many sealers enhance appearance, giving concrete a subtle sheen that makes it look richer and newer.
| Sealer Type | Protection Level | Longevity | Appearance | Best Application | Cost per 400 sq ft |
|---|---|---|---|---|---|
| Penetrating Sealer | Good | 3-5 years | Invisible (natural look) | Any driveway, when you want protection without shine | $80-120 |
| Acrylic Topical | Very Good | 2-4 years | Slight sheen | Residential driveways wanting moderate enhancement | $100-150 |
| Polyurethane | Excellent | 5-7 years | Wet look / high gloss | High-end residential, show properties | $200-350 |
| Epoxy Coating | Maximum | 7-10 years | Very glossy, can be colored | Garages, showroom driveways (expensive) | $400-600 |
Sealer application requires specific conditions for success. Clean driveway must be completely dry—no moisture can be present in concrete pores, or sealer won't penetrate properly. Apply per manufacturer directions, which typically specify temperature ranges, application methods (spray, roller, or brush), and number of coats. Most sealers last 2-4 years depending on traffic levels, weather exposure, and product quality. Reapply as recommended to maintain continuous protection.
Ongoing maintenance preserves your investment with minimal effort. Weekly or monthly sweeping removes debris before it can grind into concrete or decompose and stain. Quick hose rinses after rain or when you notice dirt accumulation prevent buildup. Most importantly, spot-clean new stains immediately—a few minutes addressing a fresh oil drip saves hours of effort later.
Seasonal attention keeps your driveway in top condition. Deep clean in spring and fall (or hire professionals for bi-annual service), inspect for cracks or damage that could worsen over winter, and address issues promptly before they expand. Small crack repairs cost pennies compared to major driveway reconstruction.
As-needed interventions make the difference between maintained and neglected driveways. Treat oil leaks immediately using the fresh oil stain methods described earlier. Address rust, tire marks, and other stains when they occur rather than letting them establish and penetrate. Touch up sealer in high-traffic areas between full reapplications to maintain continuous protection.
Preventing Common Driveway Stains
Prevention requires far less effort than stain removal and delivers better long-term results.
Oil stain prevention starts with fixing vehicle leaks promptly—that slow drip costs you hundreds in stain removal or thousands in driveway replacement. Use drip pans under vehicles with known leaks, or park leaky vehicles on cardboard that catches drips and can be easily replaced. Clean up spills immediately using the fresh oil stain method. When possible, park problematic vehicles in garages or carports rather than directly on your driveway.
Tire mark prevention involves behavioral adjustments. Avoid quick turns on your driveway that cause tires to skid and deposit rubber. Don't let vehicles sit parked in one spot during hot summer days when tires are heated—hot rubber transfers much more readily to concrete. Apply sealer to create a barrier that prevents rubber from bonding with concrete surfaces.
Organic growth prevention addresses the conditions that allow mold, mildew, and algae to establish. Improve drainage so water doesn't pool on driveway surfaces. Trim overhanging vegetation to increase sunlight exposure—most algae and mold require shade and moisture. Allow as much sunlight as possible to reach previously shaded areas. Clean regularly (at least annually) to prevent growth from establishing permanent colonies.
Red clay prevention requires creating barriers and developing habits. Establish a buffer zone between grass/landscaping and driveway edges using gravel, pavers, or concrete borders that prevent direct clay contact. Rinse shoes before driving or walking on the driveway after working in muddy yard areas. Hose down the driveway after significant rain before clay has time to dry and bond. Apply quality sealer to prevent clay particles from penetrating concrete pores.
Different Driveway Types Require Different Approaches
Not all driveways are created equal. The material composition fundamentally changes cleaning methods, pressure levels, and product selection.
Concrete driveways are the most common in North Carolina and the most forgiving for pressure washing. Standard concrete can handle pressures of 3000-4000 PSI without damage, responds excellently to pressure washing, and benefits tremendously from sealing. However, stamped or decorative concrete requires much lower pressure—typically 1500-2500 PSI—to avoid damaging surface patterns and coloring. Always check for unsealed cracks before pressure washing; high-pressure water forced into cracks can cause significant damage, breaking chunks free or widening existing damage. Some deeply penetrated stains in concrete may be permanent regardless of treatment—understanding this reality prevents unrealistic expectations.
Asphalt driveways present black or dark surfaces that hide some stains better than light concrete but require completely different cleaning approaches. Asphalt demands much lower pressure than concrete—maximum 1000-1500 PSI—because excessive pressure literally tears asphalt surface material away, causing permanent damage. Hot water proves extremely effective for oil removal from asphalt, as it softens both the asphalt binder and oil, allowing thorough flushing. Chemical degreasers work very effectively on asphalt but must be rinsed completely to prevent breakdown of asphalt binders. Regular sealing is absolutely essential for asphalt—far more critical than for concrete—as sealed asphalt resists staining and weathering while unsealed asphalt deteriorates rapidly.
Paver driveways (brick or concrete pavers) require special consideration because of their modular construction. Use moderate pressure—typically 1500-2500 PSI—as excessive pressure washes out the sand between pavers that keeps them stable and level. Plan to re-sand joints after cleaning, purchasing polymeric sand that resists washing out and prevents weed growth. Always seal pavers after cleaning and re-sanding to lock sand in place and protect individual pavers. Check for loose or shifting pavers before cleaning; high-pressure water can dislodge unstable pavers, creating tripping hazards. Given these complications, professional cleaning is often recommended for paver driveways.
Exposed aggregate driveways (decorative concrete with visible stones) combine durability with special considerations. These surfaces can generally handle good pressure—2500-3500 PSI—since the exposed stones are quite hard. Surface cleaners work excellently on exposed aggregate, providing even cleaning without disturbing stones. However, be careful with edges where exposed aggregate meets regular concrete; different heights and exposures can create damage points if you're not cautious. Sealing is highly recommended for exposed aggregate, as it protects the varied surface textures and makes future cleaning significantly easier.
| Driveway Type | Safe Pressure Range | Special Considerations | Sealing Frequency | Professional Recommended? |
|---|---|---|---|---|
| Standard Concrete | 3000-4000 PSI | Check for cracks first | Every 2-4 years | Optional (DIY feasible) |
| Stamped/Decorative | 1500-2500 PSI | Can damage pattern/color | Every 2-3 years | Strongly recommended |
| Asphalt | 1000-1500 PSI max | Easy to damage with high pressure | Every 1-2 years | Strongly recommended |
| Pavers | 1500-2500 PSI | Will need re-sanding after | Every 2-3 years | Yes (complex process) |
| Exposed Aggregate | 2500-3500 PSI | Careful at edges and transitions | Every 3-5 years | Recommended for best results |
The Reality About "Permanent" Stains
Honesty matters when discussing expectations. Some stains cannot be removed, no matter how much effort or expertise is applied.
Stains that may be permanent include very old oil stains that have had years to penetrate and chemically bond with concrete, deep rust penetration where iron oxide has migrated through the entire concrete surface layer, certain chemical spills that actually etch or chemically alter concrete, and stains that have gone through multiple freeze-thaw cycles that drive contaminants deeper with each expansion and contraction.
Stains become permanent when they've chemically bonded with concrete at a molecular level—no longer just residing in pores but actually part of the concrete's structure. When stains have penetrated too deeply, even aggressive chemical treatment and high-pressure washing can't reach contamination that extends inches into concrete. Sometimes the concrete itself is damaged—not just stained—meaning the discolored material is actual damaged concrete rather than removable contamination. Surfaces that were previously sealed improperly may have trapped stains under sealer, making them impossible to reach without removing sealer (which may cause worse damage).
Options for permanent stains exist, though they're more expensive than cleaning. Concrete resurfacing applies a thin new layer of concrete over the existing surface, completely hiding stains beneath fresh material. Decorative staining transforms the entire driveway to a darker, uniform color that incorporates existing stains as part of the varied coloration. Replacing severely stained sections involves cutting out damaged areas and pouring fresh concrete—expensive but sometimes the only solution for localized severe problems. Finally, there's the option of learning to live with character marks, accepting that a used driveway naturally shows its history.
Cost Considerations and Value Comparison
Understanding real costs—including your time—helps make informed decisions about DIY versus professional service.
DIY cleaning expenses include cleaning chemicals ($20-50 depending on stain types and severity), brushes and tools ($15-30 for stiff brushes, brooms, and application equipment), pressure washer rental if you don't own one ($50-100 per day, more for multi-day rentals), and optional sealer ($50-200 depending on driveway size and sealer quality). Don't forget to value your time—expect 4-8 hours of hard physical labor spread over multiple days for thorough DIY cleaning. Total DIY cost: $85-380 plus significant sweat equity and learning curve risks.
Professional cleaning for a standard residential driveway typically costs $150-350 including all labor, equipment, chemicals, and expertise. This price covers professional results that often exceed what DIY can achieve, requires zero time from you beyond being home for initial consultation and final inspection, includes stain pre-treatment with commercial-grade products, and delivers even, streak-free cleaning using surface cleaners. Value delivered: Superior results with zero work required and no risk of damaging your driveway through inexperienced technique.
Long-term financial perspective reveals the true value of regular maintenance. Annual or bi-annual professional cleaning extends your driveway's functional life by years or decades, prevents damage that requires expensive repair, and maintains home value—curb appeal directly impacts property values and buyer interest. Compare maintenance costs to driveway replacement at $5-15 per square foot, meaning a standard 600 square foot driveway costs $3,000-9,000 to replace. Regular $200-300 cleaning obviously costs far less than premature replacement.
Ready to Restore Your Driveway?
Whether you're dealing with stubborn oil stains, tire marks, red clay discoloration, or general grime accumulated over years, professional pressure washing can dramatically transform your driveway's appearance. At Exterior Shine, we specialize in removing even the toughest driveway stains using commercial-grade equipment, proven techniques, and the experience that comes from cleaning thousands of North Carolina driveways.
Our comprehensive driveway cleaning service includes pre-treatment of oil and stubborn stains with commercial-grade products, high-pressure surface cleaning using rotary equipment for perfectly even results, hot water application when needed for severe oil contamination, post-treatment for remaining stains with specialized approaches, and optional concrete sealing to protect your investment and make future cleaning easier.
Contact Exterior Shine at (704) 980-9859 for your free quote. Let us show you how good your driveway can look—you'll be amazed at the difference professional cleaning makes! Most customers tell us they wish they'd called us years earlier when they see their driveway returned to like-new condition.

Jake Deviney
Co-Founder & Operations Director
With over 15 years of experience in the exterior cleaning industry, Jake brings unparalleled expertise and dedication to every project. His commitment to using the latest equipment and techniques ensures that Exterior Shine stays at the forefront of the pressure washing industry.